
Introduction
Welcome to the world of sweet indulgence! If you’re a cookie lover, you’re in for a treat. The Oreo Chocolate Cake is not just any dessert; it’s a celebration of flavors that combines the beloved Oreo cookie with rich chocolate cake. This cake is perfect for birthdays, parties, or simply a cozy night in. Let’s dive into what makes this cake so special and why you should definitely give it a try!
What Makes the Oreo Chocolate Cake Special?
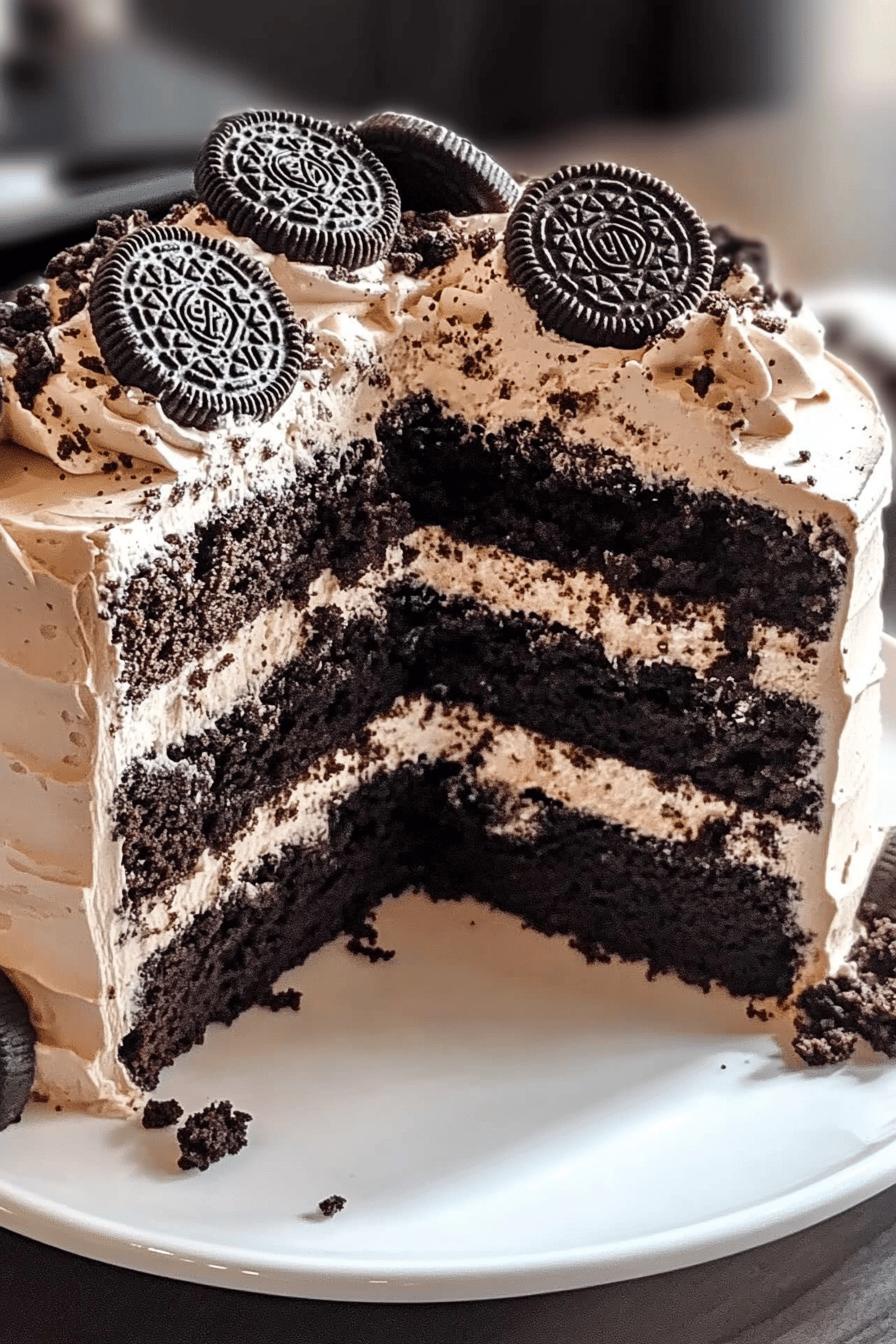
What sets the Oreo Chocolate Cake apart is its unique blend of textures and flavors. The moist chocolate cake layers provide a rich base, while the fluffy cookies & cream frosting adds a delightful creaminess. Topping it all off is a smooth chocolate ganache that melts in your mouth. Plus, the crunchy Oreo bits sprinkled throughout create a satisfying contrast. Each bite is a delightful experience that will leave you wanting more!
Why You Should Try This Recipe
There are countless reasons to try this Oreo Chocolate Cake recipe. First, it’s incredibly easy to make, even for beginners. With simple ingredients and straightforward steps, you’ll be able to whip up this dessert in no time. Second, it’s a crowd-pleaser! Whether you’re serving family or friends, everyone will be impressed by this stunning cake. Lastly, it’s customizable! You can tweak the recipe to suit your taste, making it a versatile addition to your dessert repertoire. So, roll up your sleeves and get ready to create a masterpiece that will delight your taste buds!
Ingredients for Oreo Chocolate Cake – A Dream Dessert for Cookie Lovers!
To create the delicious Oreo Chocolate Cake, you’ll need a mix of simple ingredients that come together to form a delightful dessert. Here’s what you’ll need:
For the Chocolate Cake Layers:
- 1 ¾ cups all-purpose flour
- 1 ¾ cups granulated sugar
- ¾ cup unsweetened cocoa powder
- 1 ½ teaspoons baking powder
- 1 ½ teaspoons baking soda
- 1 teaspoon salt
- 2 large eggs
- 1 cup whole milk
- ½ cup vegetable oil
- 2 teaspoons vanilla extract
- 1 cup boiling water
For the Cookies & Cream Frosting:
- 1 cup unsalted butter, softened
- 4 cups powdered sugar
- ½ cup heavy cream
- 1 teaspoon vanilla extract
- 1 cup crushed Oreo cookies
For the Chocolate Ganache:
- 1 cup semi-sweet chocolate chips
- ½ cup heavy cream
For the Final Touches:
- 1 cup crushed Oreo cookies (for topping)
With these ingredients, you’re all set to create a cake that’s not only visually stunning but also bursting with flavor. Make sure to gather everything before you start baking, as it will make the process smoother and more enjoyable!
Preparation of Oreo Chocolate Cake – A Dream Dessert for Cookie Lovers!
Now that you have all your ingredients ready, it’s time to bring this Oreo Chocolate Cake to life! Follow these simple steps to create a dessert that will wow your taste buds and impress your guests. Let’s get started!
Step 1: Preparing the Cake Batter
First, preheat your oven to 350°F (175°C). In a large mixing bowl, combine the all-purpose flour, granulated sugar, cocoa powder, baking powder, baking soda, and salt. Whisk these dry ingredients together until they are well mixed. Next, add the eggs, whole milk, vegetable oil, and vanilla extract. Mix everything together on medium speed until the batter is smooth. Finally, carefully stir in the boiling water. This will make your batter thin, but don’t worry; it’s supposed to be that way!
Step 2: Baking the Cake Layers
Now, it’s time to bake! Grease and flour two 9-inch round cake pans. Pour the batter evenly into the prepared pans. Bake in the preheated oven for 30-35 minutes, or until a toothpick inserted in the center comes out clean. Once baked, remove the pans from the oven and let them cool in the pans for about 10 minutes. Then, transfer the cakes to a wire rack to cool completely.
Step 3: Making the Cookies & Cream Frosting
While the cake layers are cooling, let’s whip up the cookies & cream frosting! In a large bowl, beat the softened butter until it’s creamy. Gradually add the powdered sugar, mixing on low speed until combined. Then, add the heavy cream and vanilla extract. Beat the mixture on high speed until it’s fluffy and smooth. Finally, fold in the crushed Oreo cookies for that delicious cookies & cream flavor!
Step 4: Assembling the Cake
Once your cake layers are completely cool, it’s time to assemble! Place one cake layer on a serving plate. Spread a generous amount of cookies & cream frosting on top. Then, carefully place the second cake layer on top. Use the remaining frosting to cover the top and sides of the cake. Make sure to smooth it out for a beautiful finish!
Step 5: Adding the Chocolate Ganache
To make the chocolate ganache, heat the heavy cream in a small saucepan over medium heat until it just begins to simmer. Remove it from the heat and add the semi-sweet chocolate chips. Let it sit for a minute, then stir until the chocolate is completely melted and smooth. Pour the ganache over the top of the frosted cake, allowing it to drip down the sides for a stunning effect.
Step 6: Final Touches with Oreo Crunch
For the final touch, sprinkle the crushed Oreo cookies on top of the ganache. This adds a delightful crunch and makes your cake look even more tempting. Now, your Oreo Chocolate Cake is ready to be served! Slice it up and enjoy every delicious bite of this dreamy dessert.
Variation of Oreo Chocolate Cake – A Dream Dessert for Cookie Lovers!
If you’re looking to switch things up or cater to different dietary needs, there are plenty of variations you can try with the Oreo Chocolate Cake. Let’s explore some alternative frosting options and a gluten-free adaptation that will still keep the deliciousness intact!
Alternative Frosting Options
While the cookies & cream frosting is a classic choice, you can experiment with other frostings to give your cake a unique twist. Here are a few ideas:
- Chocolate Buttercream: For a richer chocolate flavor, use a chocolate buttercream frosting. Simply replace the vanilla extract in the cookies & cream frosting with cocoa powder to create a chocolatey delight.
- Whipped Cream: If you prefer a lighter option, try using whipped cream. Just whip heavy cream with a bit of sugar and vanilla until soft peaks form. This will give your cake a fluffy and airy texture.
- Peanut Butter Frosting: For a nutty twist, mix peanut butter with butter and powdered sugar. This frosting pairs wonderfully with chocolate and adds a deliciously creamy layer.
Feel free to mix and match these frostings with the Oreo Chocolate Cake. Each option brings its own flavor profile, making your dessert even more exciting!
Gluten-Free Adaptation
For those who are gluten-sensitive or prefer gluten-free options, you can easily adapt this recipe. Here’s how:
- Replace the all-purpose flour with a gluten-free flour blend. Make sure it’s a 1:1 substitute to maintain the cake’s texture.
- Check that your baking powder and cocoa powder are gluten-free, as some brands may contain gluten.
- Ensure that the Oreo cookies you use are gluten-free. There are several brands available that offer gluten-free Oreo-style cookies.
With these simple changes, you can enjoy the same rich flavors of the Oreo Chocolate Cake without the gluten. It’s a win-win for everyone!
Cooking Note for Oreo Chocolate Cake – A Dream Dessert for Cookie Lovers!
When it comes to baking, a few key tips can make all the difference in achieving the perfect Oreo Chocolate Cake. Here are some important cooking notes to keep in mind as you embark on this delicious journey:
- Room Temperature Ingredients: Make sure your eggs and butter are at room temperature before you start. This helps create a smoother batter and ensures even baking.
- Measuring Ingredients: Accurate measurements are crucial for baking. Use a kitchen scale for precision, especially with flour and sugar. If you’re using cups, spoon the flour into the cup and level it off with a knife.
- Don’t Overmix: When combining the wet and dry ingredients, mix just until combined. Overmixing can lead to a dense cake, which is not what we want for this light and fluffy dessert.
- Cooling Time: Allow the cake layers to cool completely before frosting. This prevents the frosting from melting and sliding off, ensuring a beautiful presentation.
- Chill the Ganache: If your chocolate ganache is too runny, let it cool for a few minutes before pouring it over the cake. This will help it set better and create a lovely drizzle effect.
- Oreo Crunch: For the best crunch, crush the Oreos just before using them. This keeps them fresh and adds a delightful texture to your cake.
By following these cooking notes, you’ll set yourself up for success in creating a stunning and delicious Oreo Chocolate Cake. Happy baking!
Serving Suggestions for Oreo Chocolate Cake – A Dream Dessert for Cookie Lovers!
Now that your Oreo Chocolate Cake is beautifully assembled and ready to go, it’s time to think about how to serve it! The right serving suggestions can elevate your dessert experience. Here are some delightful ideas to make your cake even more enjoyable.
Pairing with Ice Cream
One of the best ways to enjoy your Oreo Chocolate Cake is by pairing it with ice cream. The creamy texture of ice cream complements the rich chocolate cake perfectly. Here are a few flavor suggestions:
- Vanilla Ice Cream: A classic choice that balances the chocolatey richness of the cake.
- Cookies and Cream Ice Cream: For the ultimate Oreo experience, this flavor enhances the cake’s cookies & cream frosting.
- Mint Chocolate Chip Ice Cream: The refreshing mint flavor adds a fun twist to the dessert.
Simply place a slice of cake on a plate and add a scoop of your chosen ice cream on the side. Drizzle some chocolate sauce over the top for an extra touch of indulgence!
Presentation Ideas
Presentation is key when serving your Oreo Chocolate Cake. Here are some creative ideas to make your dessert look as good as it tastes:
- Garnish with Fresh Berries: Add a pop of color by placing fresh raspberries or strawberries around the cake. They provide a nice contrast to the dark chocolate.
- Chocolate Shavings: Use a vegetable peeler to create chocolate shavings from a chocolate bar. Sprinkle them on top of the ganache for an elegant touch.
- Serve on a Decorative Cake Stand: Elevate your cake by placing it on a beautiful cake stand. This adds height and makes it the centerpiece of your dessert table.
With these serving suggestions, your Oreo Chocolate Cake will not only taste amazing but also look stunning. Enjoy sharing this delightful dessert with family and friends!
Tips for Making the Perfect Oreo Chocolate Cake – A Dream Dessert for Cookie Lovers!
Creating the perfect Oreo Chocolate Cake is all about attention to detail. To help you achieve cake perfection, here are some essential tips. These will guide you through common mistakes to avoid and provide storage tips to keep your cake fresh and delicious!
Common Mistakes to Avoid
Even the best bakers can make mistakes. Here are some common pitfalls to watch out for:
- Using Cold Ingredients: Always use room temperature eggs and butter. Cold ingredients can lead to a lumpy batter and uneven baking.
- Overbaking the Cake: Keep an eye on your cake while it bakes. Overbaking can dry it out. Use a toothpick to check for doneness; it should come out clean or with a few moist crumbs.
- Not Leveling the Cake Layers: If your cake layers are uneven, it can make stacking difficult. Use a serrated knife to level the tops before frosting.
- Skipping the Cooling Time: Allow your cake layers to cool completely before frosting. Frosting a warm cake can cause the frosting to melt and slide off.
- Not Tasting as You Go: Always taste your frosting and batter. Adjust sweetness or flavor as needed to ensure a delicious final product.
Storage Tips
To keep your Oreo Chocolate Cake fresh and tasty, follow these storage tips:
- Room Temperature Storage: If you plan to eat the cake within a few days, store it in an airtight container at room temperature. This keeps it moist and delicious.
- Refrigeration: For longer storage, place the cake in the fridge. Cover it with plastic wrap or foil to prevent it from drying out. It can last up to a week in the refrigerator.
- Freezing: If you want to save some for later, you can freeze the cake. Wrap it tightly in plastic wrap and then in aluminum foil. It can be frozen for up to three months. Thaw it in the fridge overnight before serving.
By avoiding these common mistakes and following the storage tips, you’ll ensure that your Oreo Chocolate Cake remains a delightful treat for days to come. Happy baking!
Breakdown of Time for Oreo Chocolate Cake – A Dream Dessert for Cookie Lovers!
Understanding the time it takes to make the Oreo Chocolate Cake is essential for planning your baking session. Here’s a detailed breakdown of the time you’ll need for each step, so you can manage your schedule effectively and enjoy the process!
Prep Time
Getting everything ready is the first step. The prep time for the Oreo Chocolate Cake is approximately 30 minutes. This includes:
- Gathering all your ingredients and tools.
- Measuring and mixing the dry ingredients.
- Mixing the wet ingredients and preparing the cake batter.
Taking your time during this stage ensures that you have everything in place for a smooth baking experience.
Cooking Time
Once your batter is ready, it’s time to bake! The cooking time for the cake layers is about 30-35 minutes. Here’s what to expect:
- Baking the cake layers in the preheated oven until a toothpick comes out clean.
- Allowing the cakes to cool in the pans for about 10 minutes before transferring them to a wire rack.
Make sure to keep an eye on the cakes as they bake to avoid overcooking!
Total Time
When you combine the prep time and cooking time, the total time to make the Oreo Chocolate Cake is around 1 hour and 5 minutes. This includes:
- 30 minutes for prep.
- 35 minutes for baking and cooling.
With this total time in mind, you can plan your baking session accordingly. Once you’ve mastered the timing, you’ll be well on your way to creating this delicious dessert that everyone will love!
Nutritional Information for Oreo Chocolate Cake – A Dream Dessert for Cookie Lovers!
Understanding the nutritional information of your Oreo Chocolate Cake can help you enjoy it even more. While this cake is a delightful treat, it’s good to know what’s in it. Here’s a breakdown of the key nutritional components per slice (assuming the cake is cut into 12 slices):
Calories
Each slice of Oreo Chocolate Cake contains approximately 350 calories. This includes the rich chocolate cake, cookies & cream frosting, and chocolate ganache. While it’s a decadent dessert, it’s important to enjoy it in moderation!
Protein
In terms of protein, each slice offers about 4 grams. The protein comes mainly from the eggs and milk used in the cake batter, as well as the butter in the frosting. While it’s not a high-protein dessert, it does provide a little boost!
Sodium
Each slice contains around 200 milligrams of sodium. This amount is typical for baked goods, as salt is often added to enhance flavor. If you’re watching your sodium intake, consider enjoying a smaller slice or pairing it with a fresh fruit salad to balance your meal.
By keeping these nutritional facts in mind, you can savor your Oreo Chocolate Cake while being aware of its components. Remember, it’s all about balance and enjoying your treats responsibly!
FAQs about Oreo Chocolate Cake – A Dream Dessert for Cookie Lovers!
Can I make this cake ahead of time?
Absolutely! The Oreo Chocolate Cake can be made ahead of time, which is perfect for busy schedules. You can bake the cake layers a day or two in advance. Just make sure to let them cool completely before wrapping them in plastic wrap. This keeps them fresh. You can also prepare the frosting ahead of time and store it in the fridge. Just remember to let it come to room temperature before spreading it on the cake.
How do I store leftover Oreo Chocolate Cake?
Storing leftover Oreo Chocolate Cake is easy! If you have any slices left, place them in an airtight container. You can keep it at room temperature for up to three days. If you want to keep it longer, store it in the refrigerator. Just make sure to cover it well to prevent it from drying out. The cake can last up to a week in the fridge. For even longer storage, you can freeze it. Wrap the cake tightly in plastic wrap and then in aluminum foil. It can be frozen for up to three months!
Can I use different types of Oreos for this recipe?
Yes, you can definitely use different types of Oreos! While classic Oreos are a great choice, feel free to experiment with flavors like Double Stuf, Mint, or even Birthday Cake Oreos. Each type will add a unique twist to your cake. Just remember that the flavor of the Oreos will influence the overall taste of the cake, so choose one that you love!
What can I substitute for eggs in this recipe?
If you need an egg substitute, there are several options you can use. For each egg, you can replace it with:
- 1/4 cup unsweetened applesauce: This adds moisture and works well in cakes.
- 1/4 cup yogurt: Plain yogurt can also provide moisture and a bit of tang.
- 1 tablespoon ground flaxseed mixed with 2.5 tablespoons water: Let it sit for a few minutes until it thickens. This is a great vegan option!
These substitutes will help maintain the texture and moisture of your Oreo Chocolate Cake while keeping it egg-free!
Conclusion
Recap of the Oreo Chocolate Cake Experience
In conclusion, the Oreo Chocolate Cake is truly a dream dessert for cookie lovers! With its moist chocolate layers, fluffy cookies & cream frosting, and rich chocolate ganache, this cake is a delightful treat that brings joy to any occasion. Each bite is a perfect blend of flavors and textures, making it a memorable dessert for family gatherings, birthday parties, or just a sweet indulgence at home. The versatility of this recipe allows you to customize it to your liking, whether you choose different frostings or adapt it for gluten-free diets. It’s not just a cake; it’s an experience that will leave you and your guests craving more!
Encouragement to Try the Recipe
So, what are you waiting for? Grab your ingredients and start baking this delicious Oreo Chocolate Cake today! With easy-to-follow steps and simple ingredients, you’ll be amazed at how quickly you can create this stunning dessert. Remember, baking is all about having fun and experimenting, so don’t hesitate to make it your own. Whether you’re a seasoned baker or a beginner, this recipe is sure to impress. Enjoy the process, and most importantly, enjoy every scrumptious bite of your Oreo Chocolate Cake!
Relevant Recipes Link:
Indulge in more delightful dessert creations with these irresistible recipes:
- Oreo Chocolate Covered Ice Cream Bars: Irresistible Indulgence
- Mini Chocolate and Peanut Butter Cheesecakes: A Decadent Treat
- Chocolate Covered Strawberry Mini Cheesecakes: Impressively Sweet
For more fantastic recipes and food inspiration, follow us on Pinterest!